
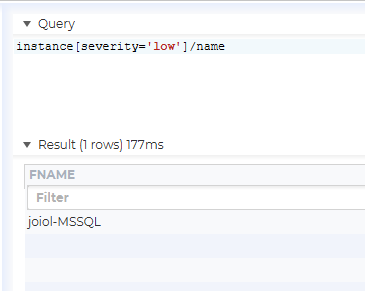
You can put metadata on instances, and this metadata will be automatically available in FDL.
To add metadata to an instance, right click on it and select “Configure”.
Then click on the “Metadata” tab.
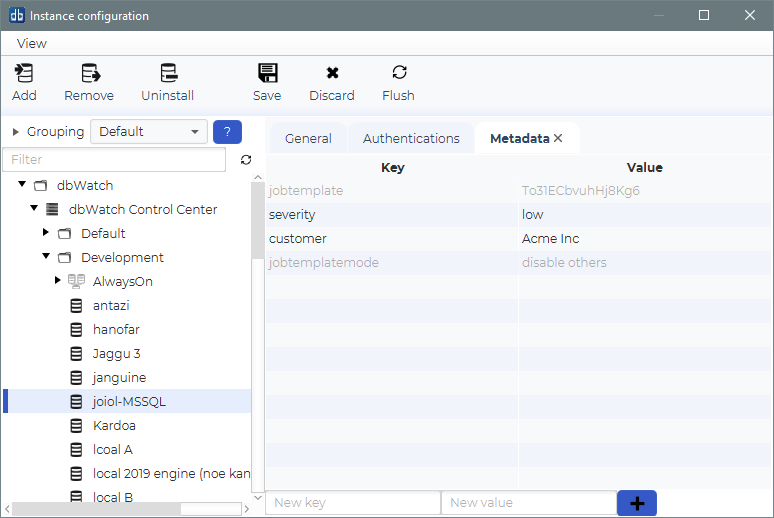
Here you can add key/value pairs by typing in the input fields on the bottom, and clicking the “+” button.
F.ex if you enter “severity” as key and “low” as the value, click “+” and then save. The information will be available in FDL.
This way of setting metadata is fine for simple ad hoc metadata. But as you might imagine, if you have multiple users freehand entering metadata, you quickly end up with a lot of different naming paradigms and spelling mistakes. To avoid this, use the Metadata dictionary to define legal metadata keys and values.
Dictionary Editor
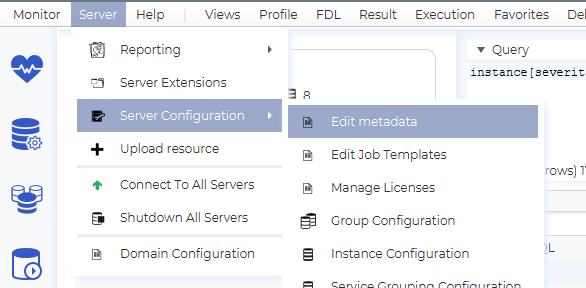
To open the Dictionary editor, find “Edit metadata” on the “Configure” -> “Server Configuration” menu.
Then click on “Edit Dictionaries” in the Metadata Editor.
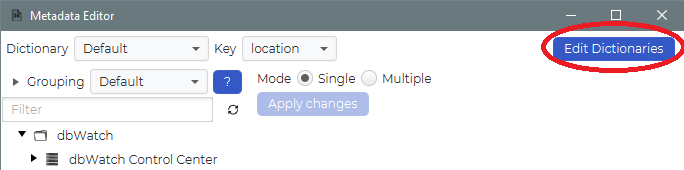
Now you should see the Editor.
It is divided into two main parts. On the left side you define the metadata keys, and on the right side you define the legal metadata values.
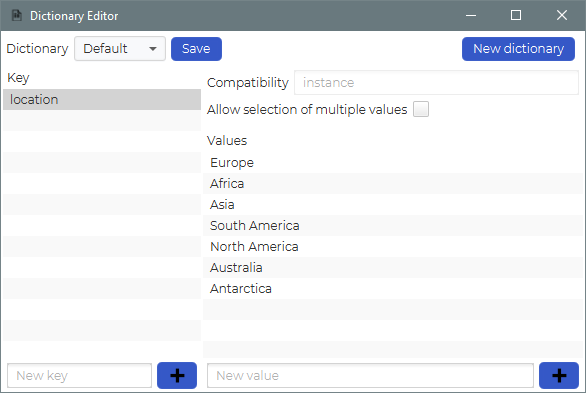
In the example above we have defined one key “location” and added the different continents as legal values.
To add a new metadata key, just type it into the field marked “New key” on the lower left and click the pluss sign.
For example we can add a key called “importance”, then type in HIGH, MEDIUM and LOW as legal values.
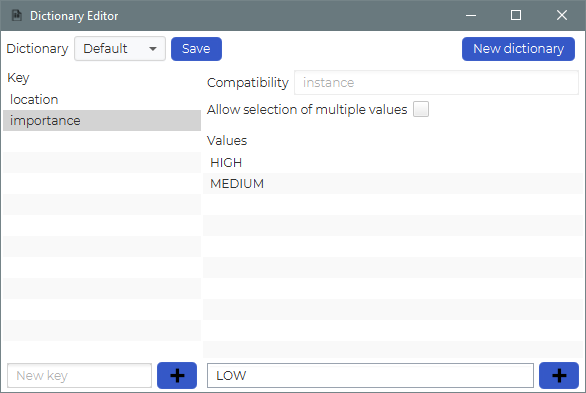
On the right side you can also see an uneditable field called “Compatibility” set to “instance”. That means that currently you can only assign this metadata to instances, but in the future other types will be supported.
Below is a checkbox called “Allow selection of multiple values”. If this is checked, it means that you can assign multiple values to a single key. For instance if you create a key called “application” with all your apllications as legal values, one instance might be assiciated with more than one application.
Metadata Editor
To assign metadata to instances in an efficient manner, you can use the Metadata Editor. (You can also edit metadata on a single instance through the normal “Configure instance” view)
To open the Metadata editor, find “Edit metadata” on the “Configure” -> “Server Configuration” menu.
You should now see the Editor.
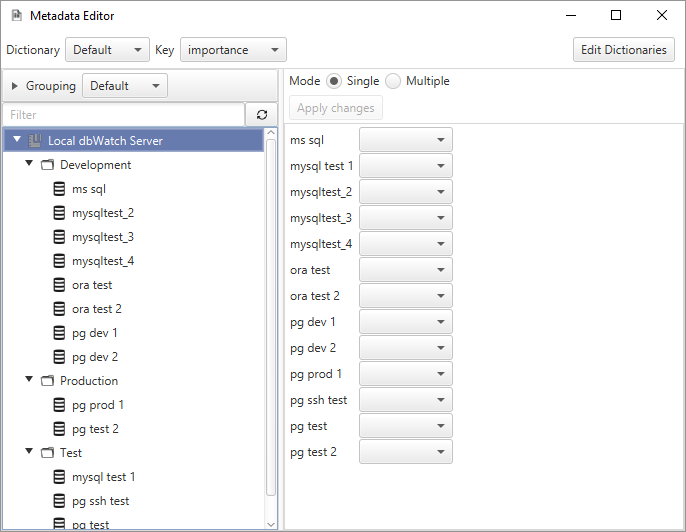
On the top you will see the different keys that are defined.

On the left you see a tree containing all the registered instances, and on the left a panel where values can be assigned.
The instances that are selected in the tree, are the ones you assign values to. So for example, if you select the “Development” group, the right side is populated with all the instances in that group.
The panel on the right has two modes, “Single” and “Multiple”. Single means you can assign values to individial instances, while multiple lets you assign values to all instances at once.
First lets look at Single mode.

As you see, each instance has a dropdown where you can select the desired value for that instance. When you are satesfied, click apply.
Multiple mode
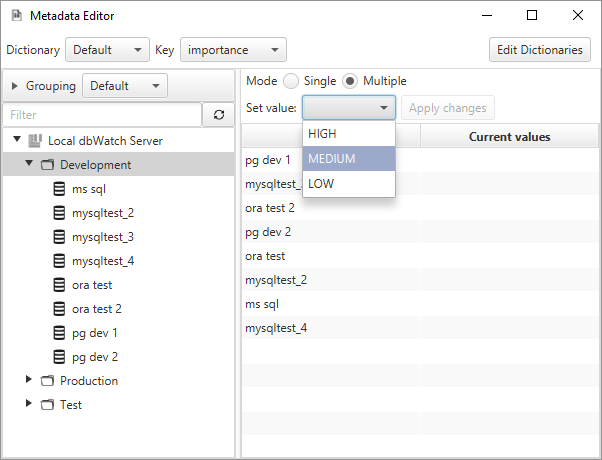
In multiple mode you have a single dropdown, and the value you select here will be applied to all the selected instances.
Instance selection
The metadata values already applied, can of course be used in the instance selection, by expanding the *Grouping” panel above the tree. See the Tree Navigation section for details.
Post your comment on this topic.