User integration with Active Directory
Overview
Integrating dbWatch Control Center with Active Directory (AD) enables centralized authentication and management. This guide outlines the steps required to configure dbWatch for AD integration, including file setup and certificate import. The integration uses the secure LDAPS protocol, which operates on port 636.
Port openings
To allow the correct communications between the dbWatch Server and the Active Directory server, some firewall openings must be in place. Typically 2 port openings are used when communicating with AD.
Port 389/TCP for unencrypted and TLS connections
Port 636/TCP for SSL connections
Depending on the setup, one or two of these ports must be open.
1. Required Configuration Files
The following files must be created and configured on the dbWatch server to enable AD integration. dbWatch Control Center service must be stopped while editing those files (In cases where operating with the dbWatch Domain Controller, only the service on the Domain Controller should be stopped, and the configuration files should be edited directly on the dbWatch Domain Controller).
1.1 server.vmoptions
Location:
C:\Program Files\dbWatchControlCenter\server.vmoptions
Content:
==#== Enter one VM parameter per line
 ==#== Adjust memory usage:
-Xmx8g
 ==#== Specify the Kerberos configuration:
-Djava.security.krb5.conf=C:\ProgramData\dbWatchControlCenter\config\domain\krb5.conf
 ==#== Debug Kerberos-related issues:
-Dsun.security.krb5.debug=true
 ==#== Debug certificate and tls issues
-Djava.security.debug=gssloginconfig,configfile,configparser,logincontext,loginmodule
-Djavax.net.debug=ssl,handshake,certpath,trustmanager
1.2 jaas.conf
Location:
C:\ProgramData\dbWatchControlCenter\config\domain\jaas.conf
Content:
com.sun.security.jgss.krb5.initiate {
com.sun.security.auth.module.Krb5LoginModule required
useTicketCache=false
doNotPrompt=false;
};
1.3 krb5.conf
Location:
C:\ProgramData\dbWatchControlCenter\config\domain\krb5.conf
Content example for DEMOAD1.LOCAL.DBWATCH.COM with two kdc server:
[libdefaults]
dns_lookup_kdc = true
dns_lookup_realm = true
ticket_lifetime = 86400
renew_lifetime = 604800
forwardable = true
udp_preference_limit = 1
realm_try_domains = 1
default_realm = DEMOAD1.LOCAL.DBWATCH.COM
[realms]
DEMOAD1.LOCAL.DBWATCH.COM = {
kdc = DEMOADSERVER1.DEMOAD1.LOCAL.DBWATCH.COM
kdc = DEMOADSERVER2.DEMOAD1.LOCAL.DBWATCH.COM
default_domain = DEMOAD1.LOCAL.DBWATCH.COM
}
[domain_realm]
.DEMOAD1.LOCAL.DBWATCH.COM = DEMOAD1.LOCAL.DBWATCH.COM
DEMOAD1.LOCAL.DBWATCH.COM = DEMOAD1.LOCAL.DBWATCH.COM
1.4 ldap.json
Location:
C:\ProgramData\dbWatchControlCenter\config\domain\ [domain name]\ldap.json
Content example for DEMOAD1.LOCAL.DBWATCH.COM with two dc server:
{
    "DEMOAD1": {
"server": [
"ldaps://DEMOADSERVER1.DEMOAD1.LOCAL.DBWATCH.COM",
"ldaps://DEMOADSERVER2.DEMOAD1.LOCAL.DBWATCH.COM"
        ],
"signing": "true",
"krb5": "C:\\ProgramData\\dbWatchControlCenter\\config\\domain\\krb5.conf",
"jaas": "C:\\ProgramData\\dbWatchControlCenter\\config\\domain\\jaas.conf",
"debug": "true",
"timeout": "5"
    }
}
2. Import Certificates into dbWatch Keystore
To establish secure communication with the AD server, the server’s certificates must be imported into the dbWatch keystore.
Keystore Location:
C:\Program Files\dbWatchControlCenter\jre\lib\security\cacerts
Steps:
1.Stop the dbWatch service.
2.Open Microsoft Management Console (MMC):
-Navigate to File > Add/Remove Snap-in.
-Add Certificates and select Computer account.
-Click Next, choose Local computer, then finish by clicking OK.
3.Navigate to Trusted Root Certification Authorities > Certificates.
4.Export the required domain certificate as Base-64 encoded X.509 (.CER) to a directory on the dbWatch server.
5.Download and open a keystore management tool (e.g., KeyStore Explorer):
-Run the tool as an administrator.
-Open the existing keystore (cacerts) located at the path above and open.
-Password: changeit (unless changed).
6.Import the certificate:
-Go to Tools > Import Trusted Certificate.
-Select the exported certificate and import it.
7.Save and close the keystore tool. (keystore (cacerts) will be overwritten during reinstallation of dbWatch Control Center, please take care of it or repeat step 1 to 7).
8.Start the dbWatch service.
Creating users
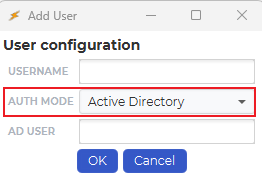
When a new user is then created, the “AUTH MODE“ must be set to “Active Directory”:

Mapping the usernames
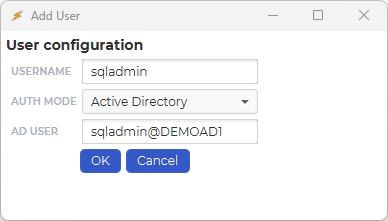
You must then map the Control Center username, in “USERNAME“ to an Active Directory user, “AD USER“. It can be a similar username, but the “AD USER“ must provide a domain after the “@”, that corresponds with the domain in the ldap.json mapping file.

Depending on your domain setup it might be necessary to prepend the domain name to the username. This is on the form domainname\username@ldap.json reference
So for the user test in the domain DEMOAD1 this would be DEMOAD1\test@demoload1
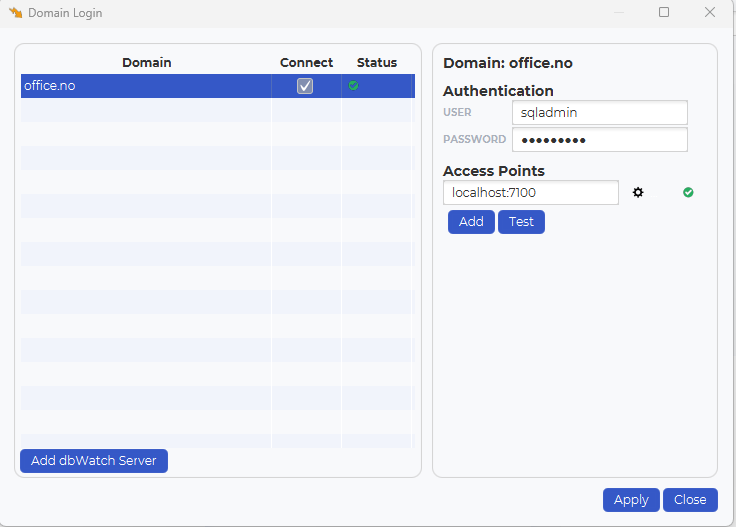
Add the credentials
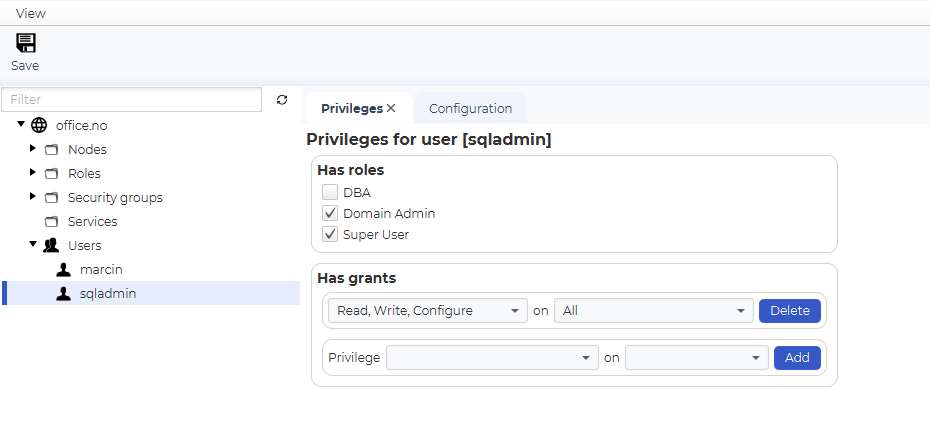
As a normal user, you can then add and modify privileges in Control Center.

Test connection
After completing the configuration, test the connection. The user’s password will be authenticated against the Active Directory server over the secure LDAPS protocol.
