Oracle Prerequisites
Oracle databases need to have a listener process running and also allow for an external login with sysdba user or user with enough privileges.
You need a privileged user, such as sys as sysdba, another user with sysdba privileges or another user with enough privileges depending on what you want to install.
This privileged user must be able to grant privileges to a monitoring user, by default dbwatch. The monitoring user must be a different user from the privileged user.
There is no need to create the monitoring user before you start this install, its created by the privileged user as part of the process.
How to get here
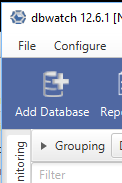
To add an Oracle instance, click on the “Add” icon on the main toolbar.
This will bring up the “Add Database Instance” wizard, which will guide you through the following steps.
Select Installation Type
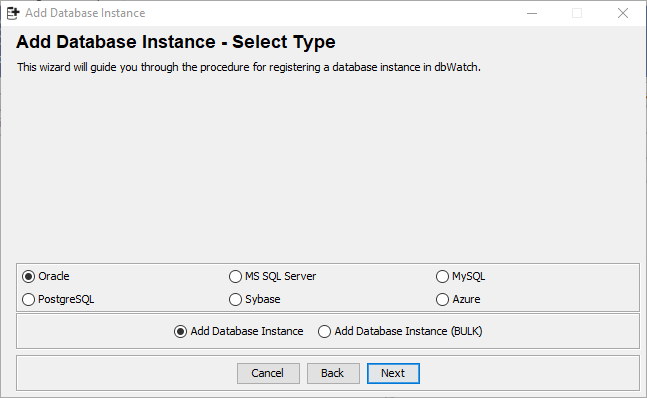
The first step of the wizard lets you select the type of installation.
Select Oracle as the database type.
There are two types of installations available, “Add Database Instance” adds a single instance and “Add Database Instance (BULK)” lets you add several instances at once.
Adding instances using BULK uses more default settings and thus allows for less customization. Select “Add Database Instance”, for details on BULK see Adding Oracle Instances BULK.
Click “Next”.
Select Connection Details
Next you specify the connection details for the instance.
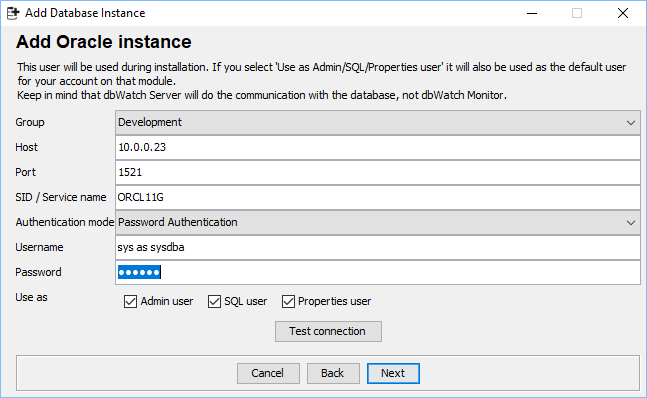
By default there are three groups to add instances into into defined in dbWatch. Development, Production and Test. The “Group” selector lets you choose which group you want this instance to be added into.
The “Host” info is the hostname or ip address of the database instance. The “Port” is the port number where the listener prosess is listening on. In the “SID / Service name” field allows you to spesify the SID or Service name for the instance you are about to add.
“Authenticaion mode” can either be “Password Authentication” or “Kerberos Authentication”. Kerberos authentication requires aditional setup, which is not covered here. The “Username” is the username of a privileged user that is used for installation. This user will also by default be used for management (Admin user), worksheet (SQL user) and gathering information for gui components (Properties user). You can use test connection to test if this user can connect and have the right privilges. You will be prompted for any privileges needed for the initial install, if they are not present.
Click “Next”.
Select Name and Monitoring user
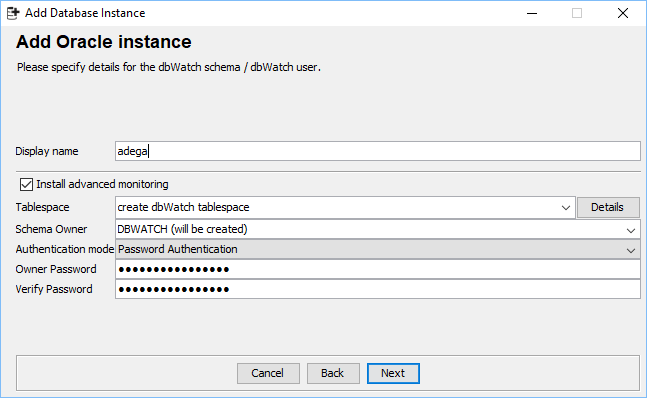
Next specify Display Name for the instance. This can be anything you like, but it must be a unique name since it will be used to identify this instance in dbWatch.
Display Name cannot contain the following characters: ‘/’, ‘?’, ‘’‘, ‘\’, ‘{‘, ‘}’, ‘<’, ‘>’, ‘;’, ‘&’, ‘%’, ‘#’, ‘\’, ‘,’.
Most of the checks in dbWatch is part of Advanced Monitoring, and if you want this instance to have anything but very basic monitoring, have this enabled. You can also set up the schema owner / monitoring user.
You can view and change the tablespace details by clicking on the “Details” button.
The password is auto generated upon install, so different from each installation of dbWatch.
Click “Next”.
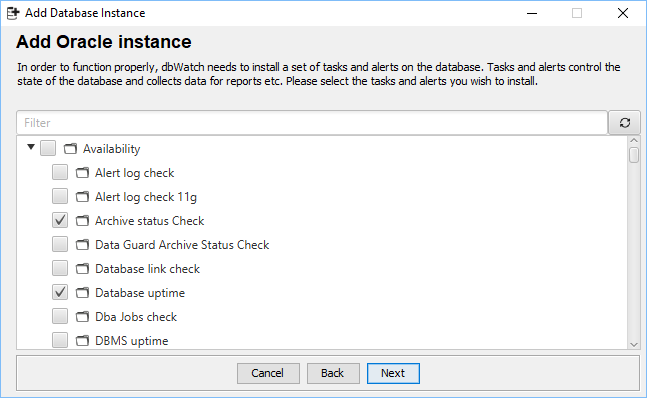
Select Tasks
This step will only be shown if the Monitoring module is selected.
Here you can specify the monitoring tasks that should be installed for this instance. As you can see a number of tasks have been pre-selected, these are the “Standard” tasks that dbWatch recommends installing.
Click “Next”.
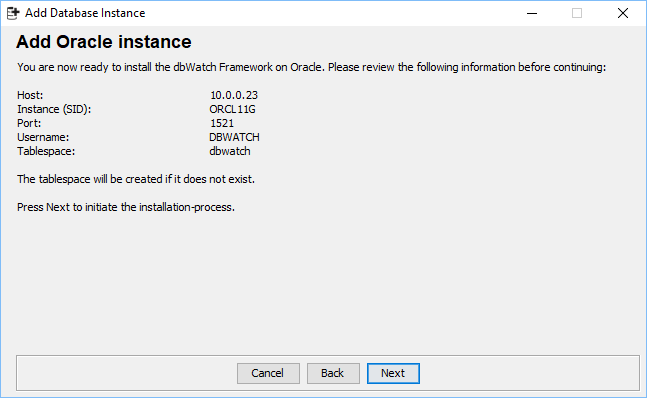
Installation Summary
Here you can see a summary of the installation details you have provided. If you are satisfied, click “Next”.
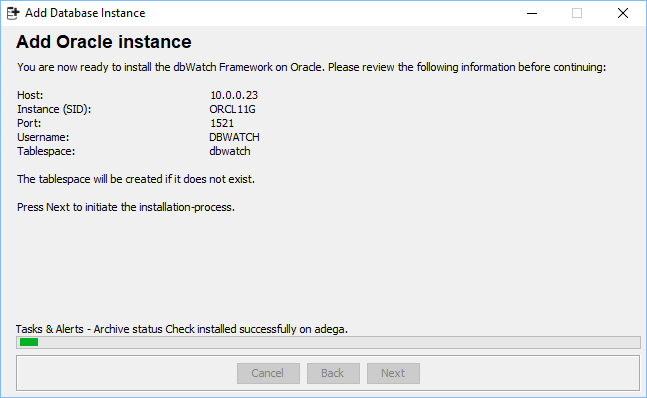
Installation
The instance will now be registered in dbWatch. Depending on the modules selected, network and instance, this process can take from a few seconds to a few minutes.
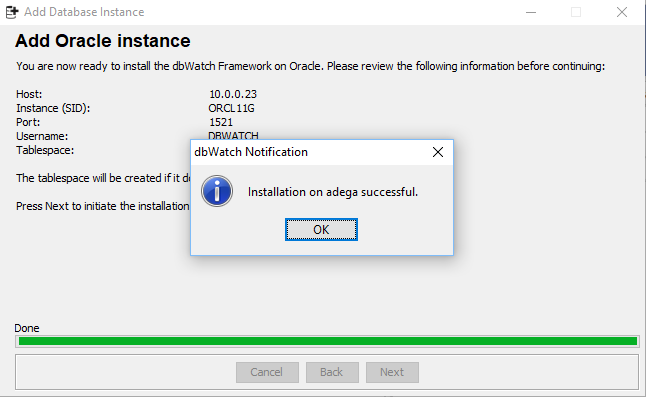
When the installation is completed, you should get the following message.
Click “OK” and you will return to the main dbWatch Monitor window.
← Defining Autodiscover Ports / Adding Oracle Instances (BULK) →


Post your comment on this topic.