
How to get here
To open the “Add Instance Wizard”, click on the “Plus (+)” sign on the bottom left of the dbWatch Client.
Select Instance Type and Input Connection Details

Specify the host and port number.
dbWatch will attempt to select the correct instance type based on the entered port number. If the instance type is wrong, select the correct one in the drop down.
The authentication types available will depend on the selected instance type.
Choose an authentication type whether “SQL Server Authentication”, “OS Authentication” or “Kerberos”.
You need to specify a login with a server administrator role that will be used during the installation.
| OS Authentication | Connects to the MS SQL Server using the account the dbWatch Server Services is running under. This could require additional configuration, more here |
| SQL Server Authentication | Connects using the provided login and password. |
| Kerberos | Connects through kerberos using the provided login and password. This could require additional configuration, more here |
By default dbWatch will select the most apropiate JDBC driver for the database instance. It is possible to select a specific JDBC driver and set driver properties by clicking on “Advanced Driver Setup”. Read more.
Click “Next”.
Define Monitoring
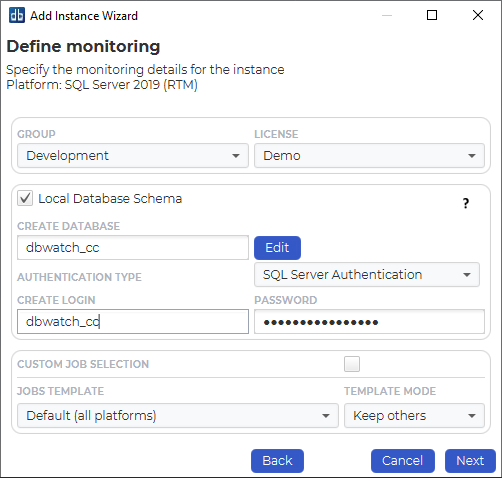
Specify the group and license for the instance. Default groups are Development, Test and Production, but you can easily create and customize your own groups based on your requirements.
The licensing options available will depend on your license. The selected option will determine what monitoring jobs are available.
You can choose to register this instance with or without a local database schema. This choice will influence the available monitoring jobs. Some jobs require objects in the database (procedures, tables etc.), others do not. We recommend installing a database schema, as this will give the most monitoring options.
By default you install the jobs that are part of a template. You can choose the template you use, and have your own custom templates. If you want to enable custom job selection while adding the instance, you can click on the “Custom job selection” radio button.
Click “Next”.
If you do that the next window will allow this selection:
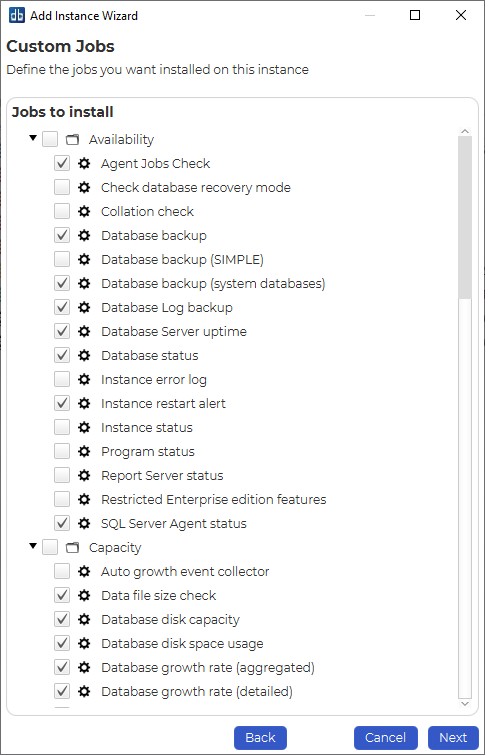
You can stick with the jobs that are selected by default or customize the selection as needed.
Click “Next”.
Define Module authentications
Within this window you have an option to choose which credential to use for each module within dbWatch.
You can use the existing credentials, or select specify a new one.

If you’ve finished specifying a credential for each module. Click Next.
Instance Installation
![instance-name]()

Specify a display name for this instance. You can also provide a description or any relevant information you want to remember about this instance.
Click Install to start installing.
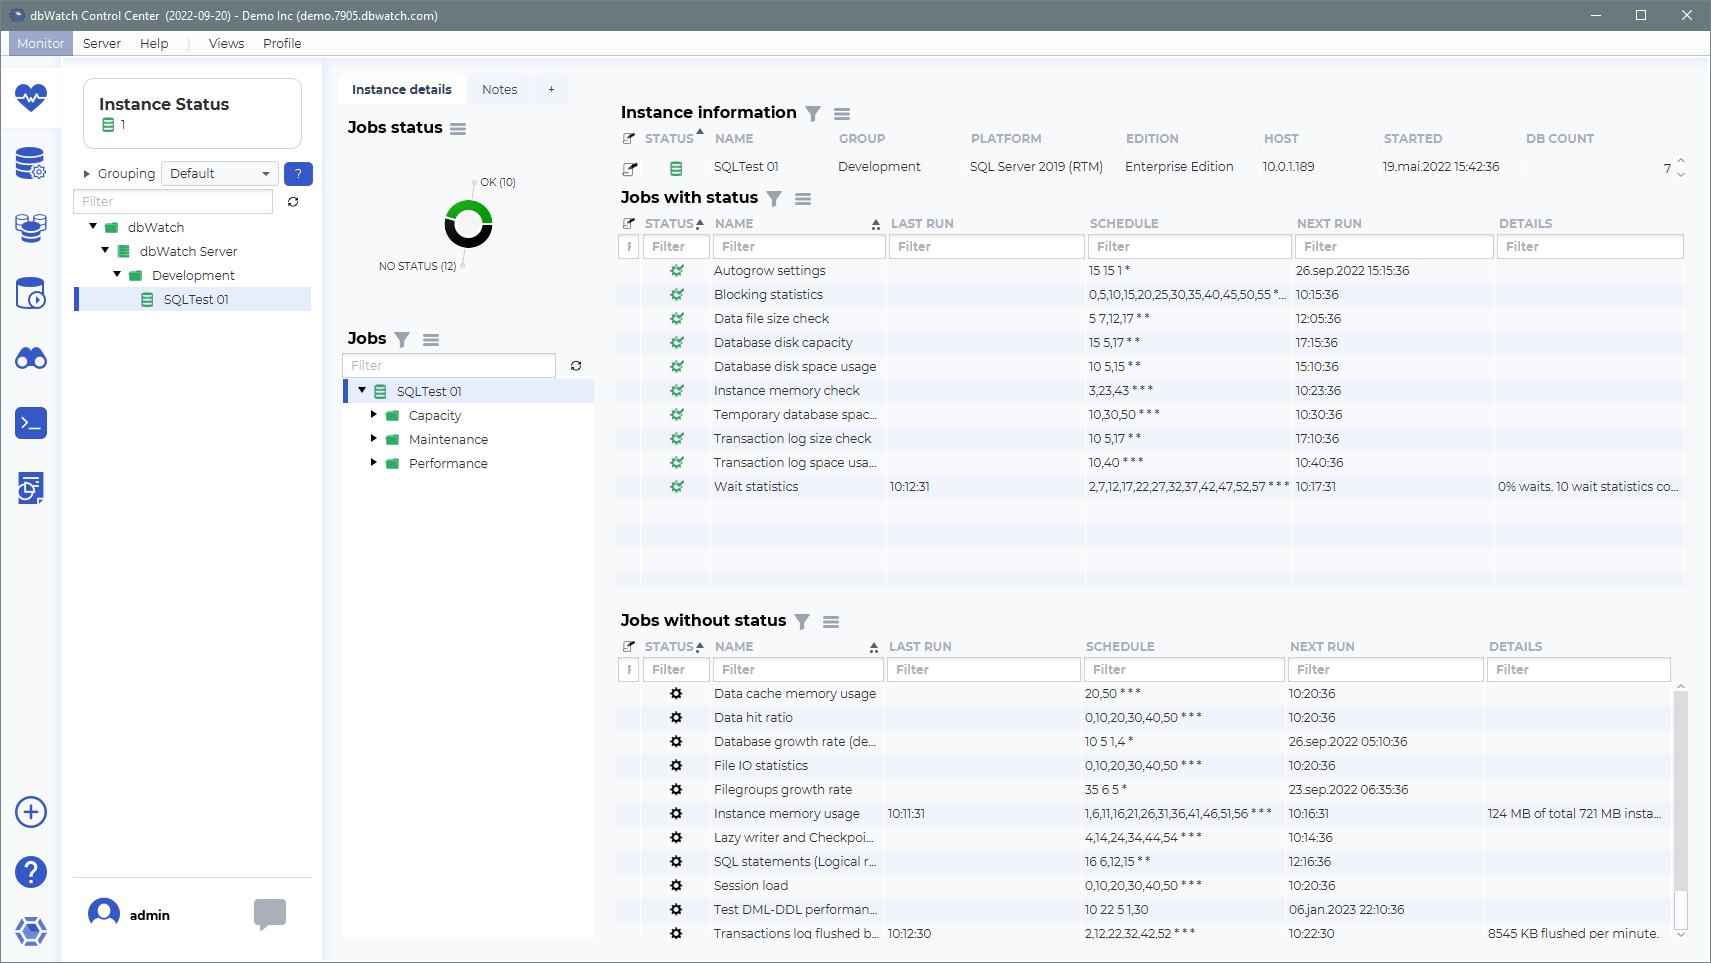
Underneath you will see the status of various jobs being installed.

We’ve now successfully added the SQL Server instance in our dbWatch monitor.
Post your comment on this topic.